Quick Start Guide
Get up and running with Email to Jira in minutes.
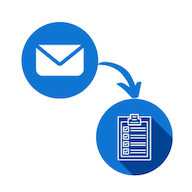
📝 What This Add-in Does
Transform Outlook emails into Jira issues with one click. AI-powered by Google Gemini, it automatically generates structured summaries and extracts action items from your emails. Keep complete context, formatting, and email attachments intact.
🎉 Free Trial
Start with a 7-day free trial to explore all features. No credit card required. After the trial, a subscription is required for continued use.
✅ Before You Start
- Microsoft 365: Work or school account (Business or Enterprise)
- Outlook: Outlook Web or Desktop (Windows/Mac)
- Installation: Self-install from AppSource in Outlook, or deployed by Microsoft 365 admin through Admin Center
📋 Jira Requirements
- Jira Cloud: Active Jira Cloud instance (Server/Data Center not supported)
- Project Access: Permission to create issues in at least one project
- Permissions: Browse Projects and Create Issues permissions
⚠️ Important
This add-in only supports Jira Cloud. Jira Server and Jira Data Center are not supported.
Install the Outlook Add-in
You can install the add-in yourself from the Office Store in Outlook, or your Microsoft 365 admin can deploy it for the entire organization. Choose the option that applies to you.
Option A: Self-Install (Individual Users)
Install directly from within Outlook. Available immediately, no admin required.
New Outlook / Outlook Web
- Click "More apps" (or "Apps") in the toolbar or navigation bar
- Select "Add apps"
- Search for "Email to Jira Ticket"
- Click "Add" to install
Classic Outlook for Windows
- Click "Get Add-ins" in the ribbon (Home tab)
- Search for "Email to Jira Ticket"
- Click "Add" to install
Outlook for Mac
- Go to Tools → Get Add-ins
- AppSource will open in your browser
- Search for "Email to Jira Ticket"
- Click "Get it now" to install
✅ Instant Access
Self-installed add-ins are available immediately; no waiting required. You may need to close and reopen Outlook to see the add-in.
💡 Note
Some organizations restrict self-installation of add-ins. If you don't see the option to add apps, contact your IT administrator.
Option B: Admin Deployment (Organization-wide)
For IT administrators who want to deploy the add-in to the entire organization or specific groups of users.
Access Admin Center
Go to Microsoft 365 Admin Center → Settings → Integrated apps
Deploy Add-in
- Click "Get apps" or "Upload custom apps"
- Search for "Email to Jira Ticket"
- Select the add-in and click "Get it now"
Configure Deployment
- Choose deployment scope: Entire organization or Specific users/groups
- Review permissions required by the add-in
- Click "Deploy"
Wait for Propagation
Admin-deployed add-ins can take 1-24 hours to appear in users' Outlook. Users may need to restart Outlook or clear browser cache.
🏢 Admin Benefit
Admin deployment automatically pushes the add-in to all targeted users. No action required on their part.
First-Time Setup (For Users)
Open an Email
In Outlook, open any email you want to convert to a Jira issue.
Open the Add-in
Click the "Apps" button in the Outlook toolbar, then find and select "Email to Jira Ticket" from the app menu.
Connect to Jira
- Click "Connect to Jira"
- A popup window will open for Atlassian OAuth authorization
- Sign in to your Atlassian account if prompted
- Select the Jira site you want to connect
- Click "Accept" to grant the add-in access
- The popup will close and you'll be connected
🔐 Authentication
Jira uses secure Atlassian OAuth 2.0 authentication. Your credentials are never stored locally. You can revoke access at any time from your Atlassian account settings.
Start Your Free Trial
- Click "Start Free Trial"
- Enjoy 7 days of full access to all features
- No credit card required
- After trial, subscribe to continue using the add-in
Creating Your First Issue
Select Site & Project
- Site: Select your Jira Cloud site (if you have access to multiple)
- Project: Choose the project where you want to create the issue
- Issue Type: Select the issue type (Bug, Task, Story, Epic, etc.)
Configure Issue Details
- Summary: Auto-filled from email subject (editable)
- Description: AI-generated summary with action items extracted (editable)
- Assignee: Select team member (optional)
- Priority: Set issue priority (optional)
🤖 AI-Powered
Google Gemini analyzes your email and generates a structured summary with action items. You can review, edit, or skip AI processing before creating the issue.
Review & Create
- Review all fields
- Click "Create Issue"
- Wait for confirmation (usually 2-5 seconds)
Success!
You'll see a success message with:
- Issue key (e.g., PROJ-123) and summary
- Direct link to view in Jira
- Option to create another or close the add-in
Note: The original email is automatically attached as an .eml file, and any email attachments are uploaded separately to the issue.
Key Features
🤖 AI-Powered Analysis
Google Gemini generates structured summaries and extracts action items from emails
📧 Email Preservation
Original email saved as .eml with full formatting, headers, and thread context
📎 Attachment Upload
Email attachments automatically uploaded to Jira issues
👥 Team Assignment
Assign issues to team members directly from Outlook
🎯 Issue Types
Support for Bug, Task, Story, Epic, and custom types
🏢 Multi-Site
Switch between multiple Jira Cloud sites seamlessly
Quick Troubleshooting
Add-in Not Appearing in Outlook
- Self-installed: Close and reopen Outlook, or sign out and back in
- Admin-deployed: Wait a few hours after deployment (up to 24 hours)
- Restart Outlook completely
- Clear browser cache (for Outlook Web)
- If self-install is unavailable, your organization may restrict user-installed add-ins. Contact your IT admin.
"Connect to Jira" Not Working
- Check that popups are not blocked by your browser
- Ensure you have a Jira Cloud account (Server/Data Center not supported)
- Try disconnecting and reconnecting via OAuth
"No Projects Found" Error
- Verify you have access to at least one Jira project
- Check you have "Browse Projects" and "Create Issues" permissions
- Ensure you selected the correct Jira site during OAuth
Quick FAQ
Does this work with Jira Server or Data Center?
No, this add-in only supports Jira Cloud. Jira Server and Data Center are not supported due to authentication and API differences.
How does the AI feature work?
Google Gemini AI analyzes your email content and generates a structured summary with extracted action items. You have full control to review, edit, or skip AI processing.
Can I use this on mobile devices?
No, the add-in is only supported on Outlook Web and Outlook Desktop (Windows/Mac). Mobile support is not available.
What happens to email attachments?
The entire email is preserved as an .eml file. Additionally, individual email attachments are uploaded separately to the Jira issue.
Can I connect multiple Jira sites?
Yes, if you have access to multiple Jira Cloud sites through your Atlassian account, you can select which site to use when creating issues.
Can I install this add-in myself, or does my admin need to do it?
Both options are available. You can install it yourself from the Office Store within Outlook (More apps → Add apps), or your Microsoft 365 admin can deploy it organization-wide through the Admin Center. Some organizations may restrict self-installation. Contact your IT admin if you don't see the option.
Need Help?
📧 Contact Support
For issues, questions, or feature requests:
Email: support@innovaapps.ai